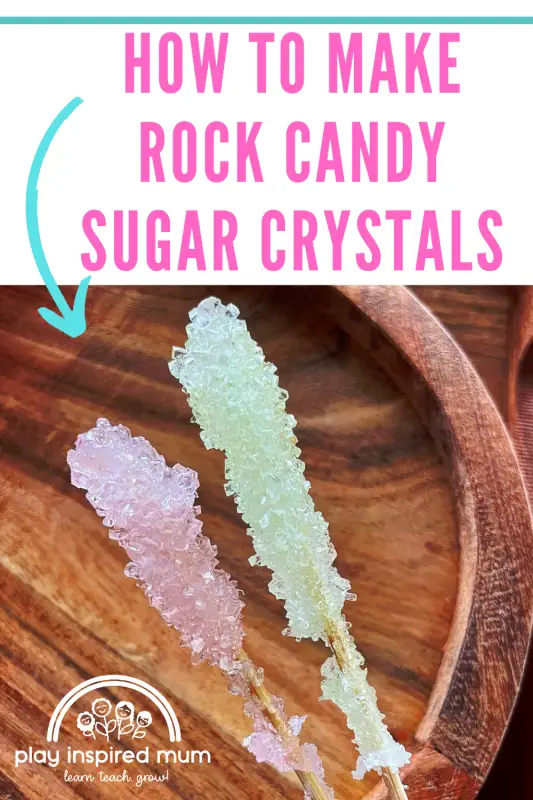
How to make sugar crystals rock candy
Disclosure: This blog contains affiliate links which I may earn a small commission from if you purchase through them, at no extra cost to you.
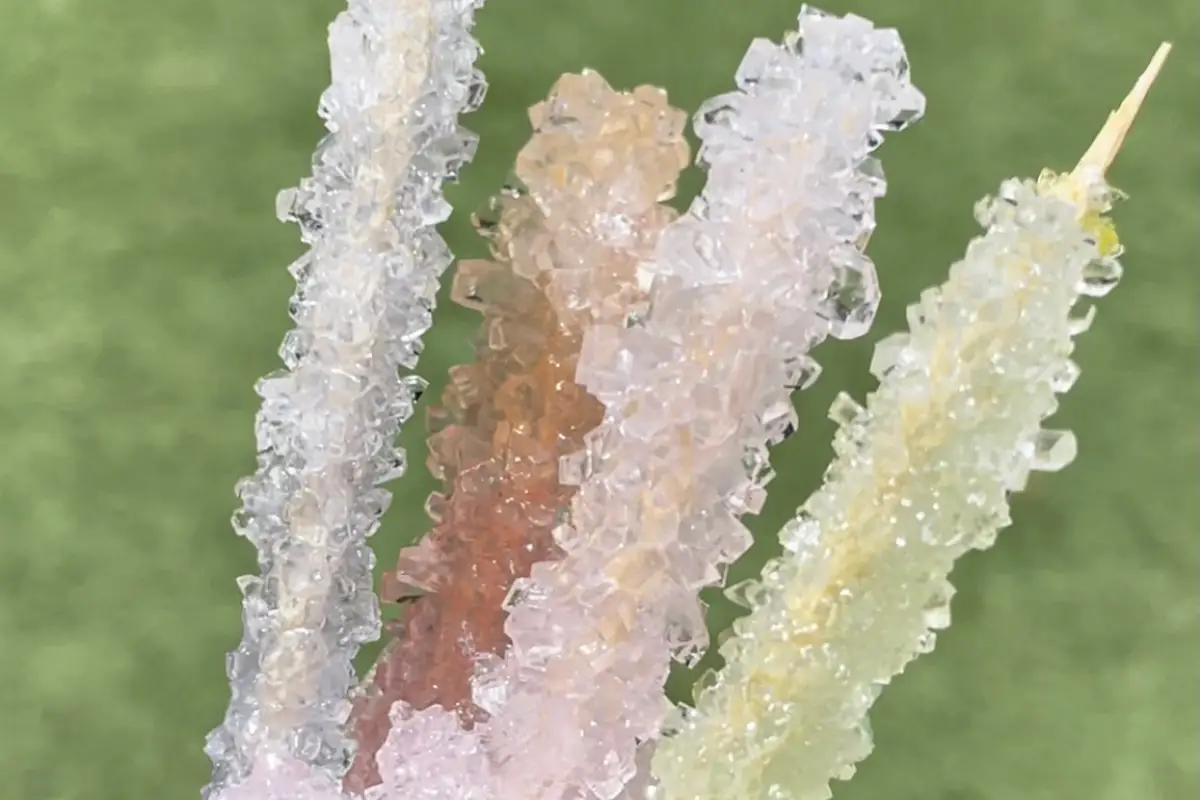
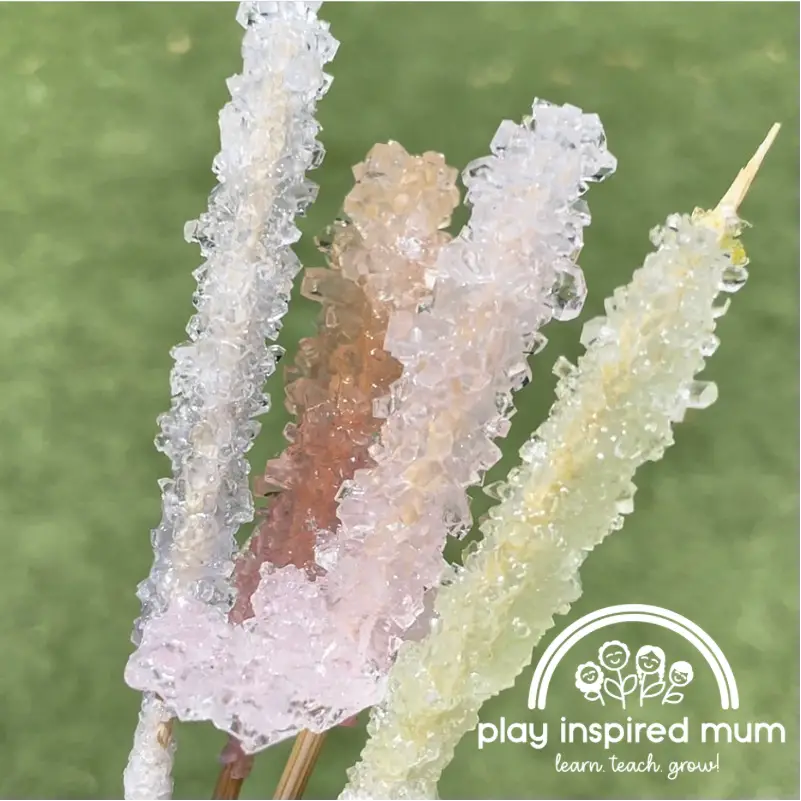
Rock candy sugar crystals are a homemade treat that’s easy to make with sugar, water and time. All you need is five minutes of your time to create the perfect homemade sugar crystals for any occasion. All while exploring some interesting scientific processes and concepts!
DIY Rock Candy Recipe & Science Experiment
This recipe makes an amazing candy that looks super delicious and fun to watch the light reflect off the faces of the crystals! The crystals are so pretty to watch glisten in the sun light.
You and your children will be educated on and apply scientific concepts like
- Solutes
- Solvents
- Density
- Saturation
- Viscosity
- Supersaturated solution
Read on to learn how to create rock candy sugar crystals at home with pantry ingredients.
Rock Candy is a tasty treat and great fun to make while you jump into serious chemistry! Kids love the reveal of their creations. This science experiment is so rewarding!
- How to grow sugar crystals to make rock candy
- What you need to grow sugar crystal and rock candy at home
- The science behind the crystals
- Chemistry terms to know
- How sugar crystals are formed
- Instructions
- Creating sugar crystal growing solution
- Create the seed crystal
- How do I make sugar crystals fast
- How to store homemade rock crystals
- More fun with science
How to grow sugar crystals to make rock candy
Growing sugar crystals to make homemade rock candy really is a simple process.
While it is simple, completing this science experiment does involve working with a very hot solution. It is recommended that a capable adult completes these steps to avoid injuries.
That being said, this edible science experiment is super fun to watch! It explores so many chemistry concepts! the hands on learning in this activity will really help concrete (or crystallise) these these terms on concepts too!
In short, rock candy is a type of sugar that is made by boiling sugar and water together until the point of saturation has been met. A seed is then added to the solution on a growth vessel. The sugar crystals formed are then removed from the solution and allowed to dry.
Rock candy can be used for many different things, such as making homemade candy or decorations.
What you need to grow sugar crystal and rock candy at home
- 2 cups of water
- 6 cups of white sugar
- 1/4 cup of white sugar, extra
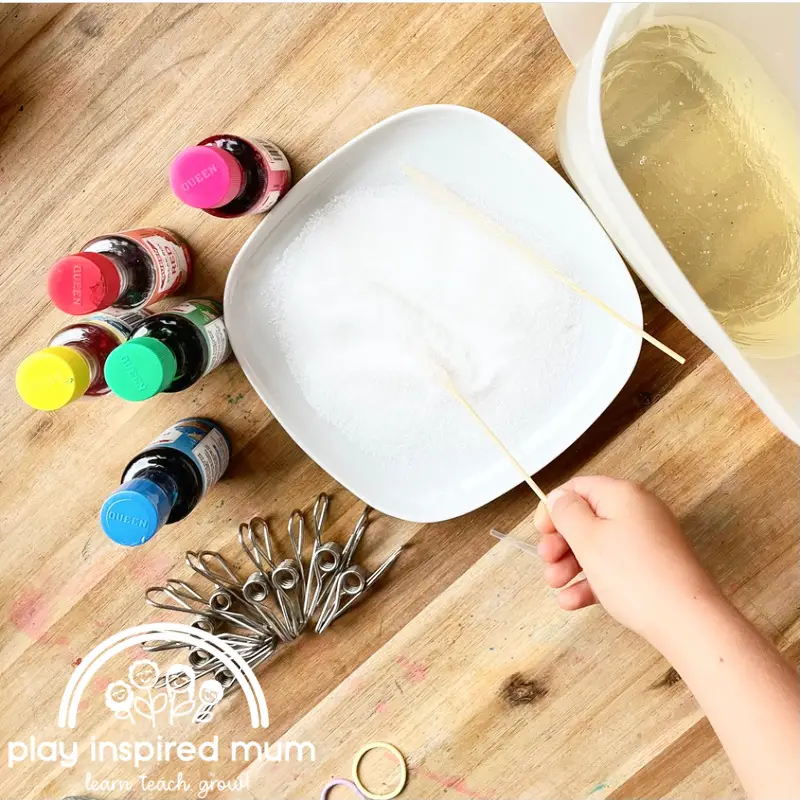
- Food colouring (optional)
- Flavour essences (optional)
- Saucepan
- Whisk
- Jar
- Skewer, Pegs and Elastic Band or Popstick and String
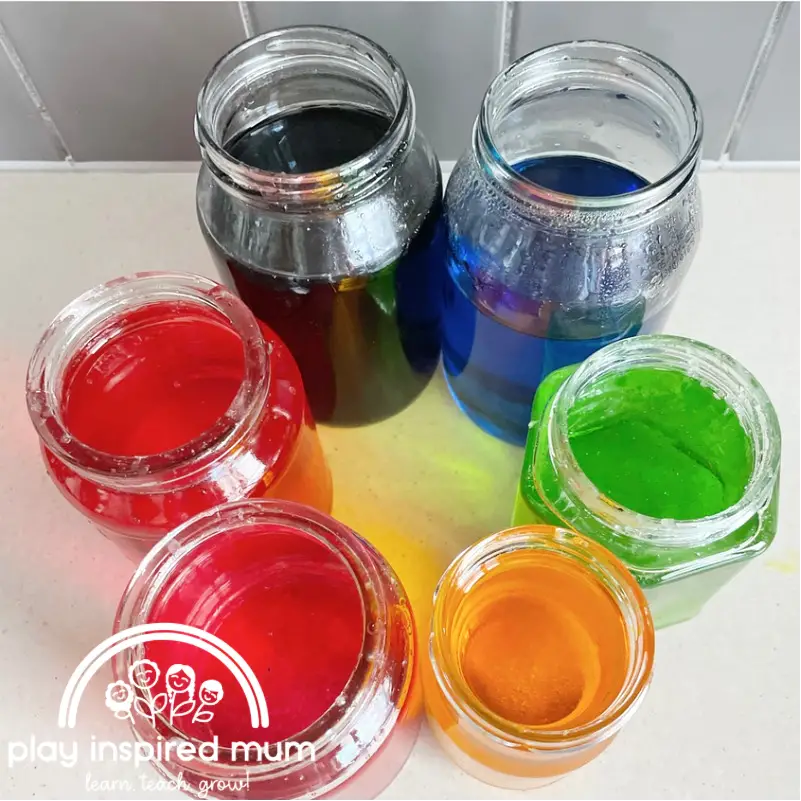
These qualities will give you a large yield of the crystal growing solution. We attempted to create one of each colour of the rainbow, each colour needing to grow in an individual jar. This is why we made a larger volume of the sugar solution.
Keep to the ratio, 1 part water : 3 parts sugar and you will be growing crystals in no time!
We grew our sugar crystals on skewers, using an elastic and and some pegs to stabilise the growth. A popular alternative is to use string tied to a pop stick. We will give instructions on both techniques further down.
INCREDIBLE EDIBLE SCIENCE: Sugar Crystals
The science behind the crystals
Making homemade rock candy crystals is an easy and fun activity. That is, an activity that can be done with friends or family members of all ages!
The finished homemade rock candy crystals can be enjoyed by themselves as a sweet treat, used in desserts like ice cream sundaes and milkshakes, given away as gifts to others and reused as decoration.
Making homemade rock candy crystals doesn’t take up much time and uses only a few ingredients which makes it a great way to spend an afternoon!
If you’re looking for a science project to do with your kids, making homemade rock candy crystals is perfect!
Chemistry terms to know
- Density – the amount of matter contained within a substance
- Saturation – the point of which a maximum amount of solute has been dissolved within a solvent
- Solute – the minor component within a solution
- Solvent – the major component within a solution that dissolves the solute
- Viscosity – a fluids resistance to change shape at a given rate
- Supersaturated solution – a solution which has met its saturation point, unable to dissolve further solute
How sugar crystals are formed
Making homemade rock candy crystals is a simple process that involves boiling water and sugar until saturation has been reached and letting the crystals grow via heterogeneous nucleation. Once dry, the homemade rock candy crystals will become hard and crunchy, and will crystallize on their own without any help from a cooling process!
Instructions
Step 1: Creating the sugar crystal growing solution
Bring to the water to boil while whisking in the sugar, until the solution meets saturation point. That is, until the sugar is no longer dissolving or has become a supersaturated solution. Some sugar will be at the bottom on the saucepan, unable to be melted and dissolved into the solution.
Allow to cool over approximately 4 hours. This is an important step. If the solution is not cool enough, it will destroy the seed on the growth vessel, rendering the experiment unsuccessful. trust me here – I speak from experience! Whoops…!
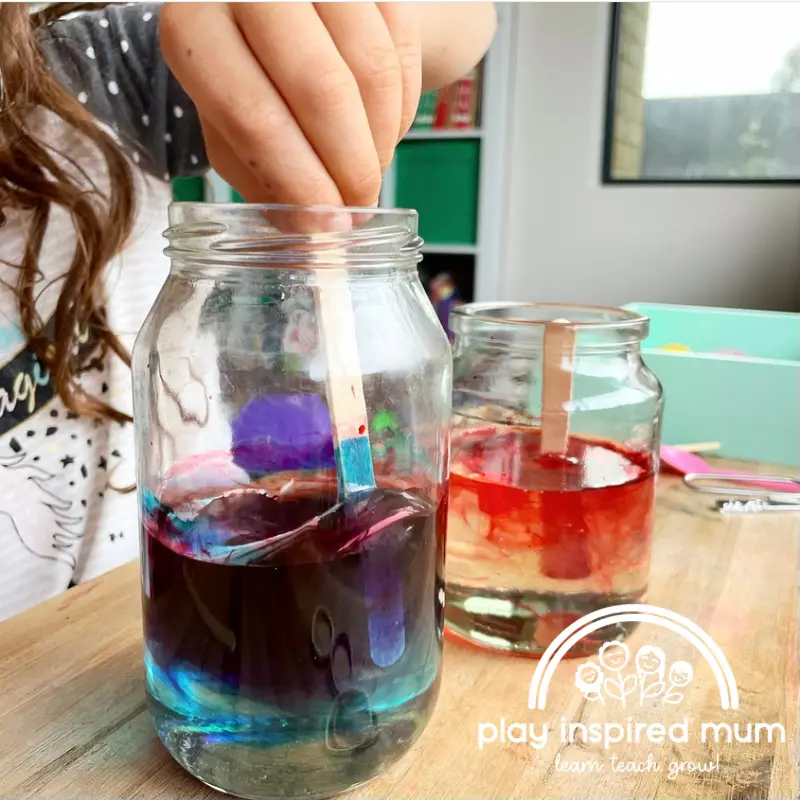
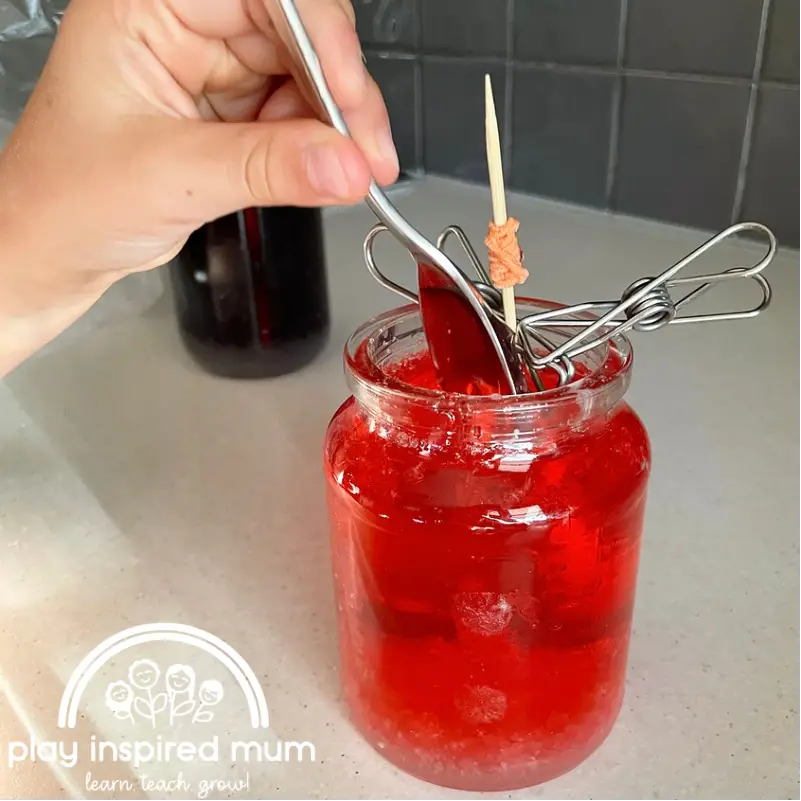
Pour the crystal growing solution into the jar. If you are going to add colour to your crystals, add the food colouring, stirring until mixed through.
Scientific point to discuss: The density of the sugar crystal growing solution is much greater than water alone. Dissolving the sugar has created a thick syrup. This has reduced the solutions viscosity. Learn more about these terms here!
Step 2: Create the seed crystal
A seed crystal is basically a small crystal used as a nucleation site for the particle growth a much larger crystal.
There are two techniques that each work as well as each other in this step. Choose one that suits the materials and resources that you have on hand.
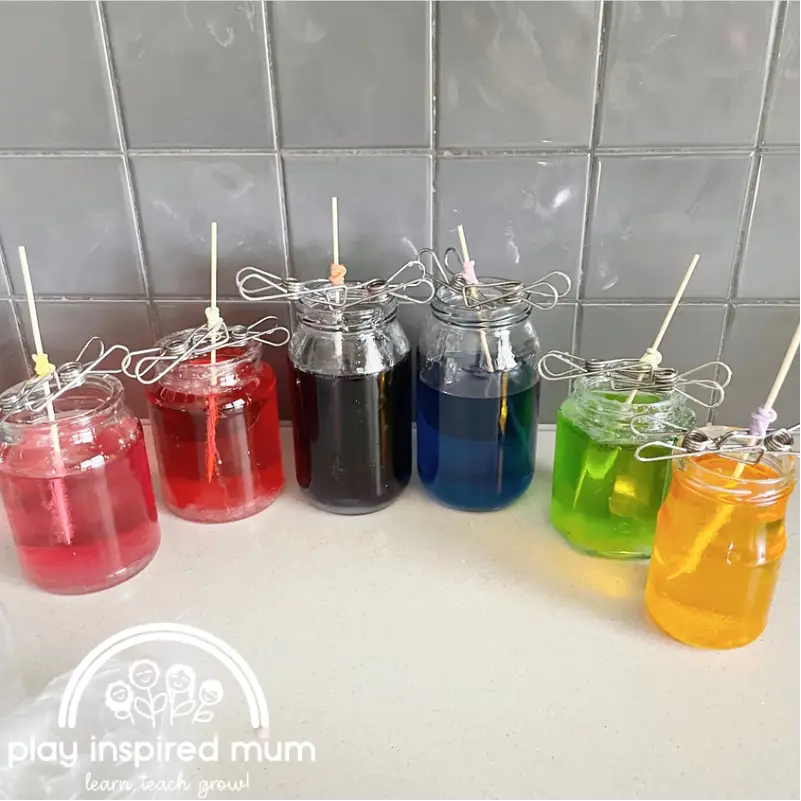
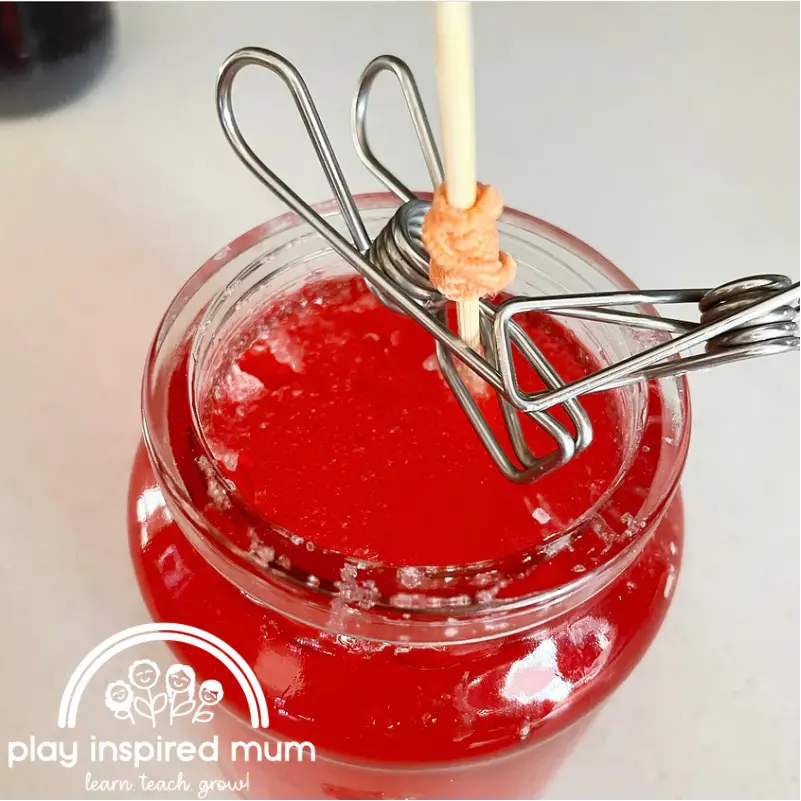
Technique 1 : Skewer
The crystal is formed along the shaft of the skewer with this technique. The skewer is suspended in the sugar crystal growing solution, being supported by two pegs resting the edges of the jar. To stop the skewer sliding between the pegs, an elastic band is secured above the pegs.
- To determine the position of the elastic band, hold the skewer next to the jar. The end of the skewer should be 1-2cm from the bottom of the jar. Position the elastic band to align with the top of the jar.
- Dip the skewer into the cooled crystal growing solution prepared in Step 1. Gently pat the saturated skewer into the extra sugar, to coat. Take care to pat the sugar on gently so not to dislodge your newly created seed crystals.
- Secure a peg either side of the skewer, under the elastic band before settling the seeded skewer gently into the sugar crystal growing solution within the jar.
Technique 2: String
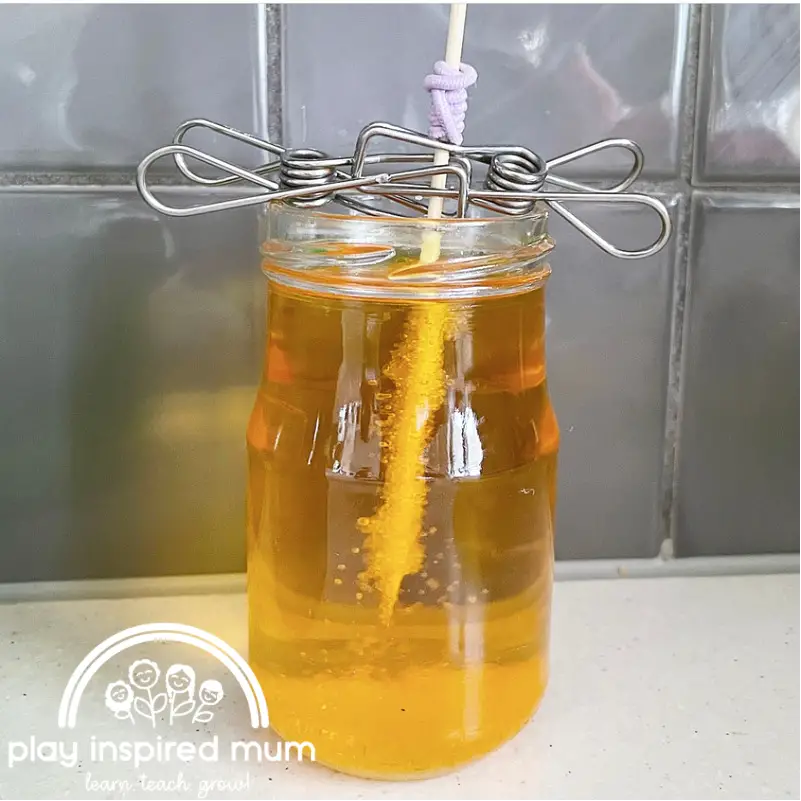
The string technique involves growing crystals along a length of string. The string is suspended into the sugar crystal growing solution from a pop stick that rests across the top of the jar.
- Simply tie some string to the middle of the pop stick. Check the length of the string by placing it next to the jar. The end of the string should be 1-2cm from the bottom of the jar. Simply trim any extra length.
- Once the correct length is determined, dip the string into the sugar crystal growing solution. Once saturated, drop the string into the extra sugar to coat.
- From here, drop the string covered in sugar into the sugar crystal growing solution, resting the pop stick across the top of the jar.
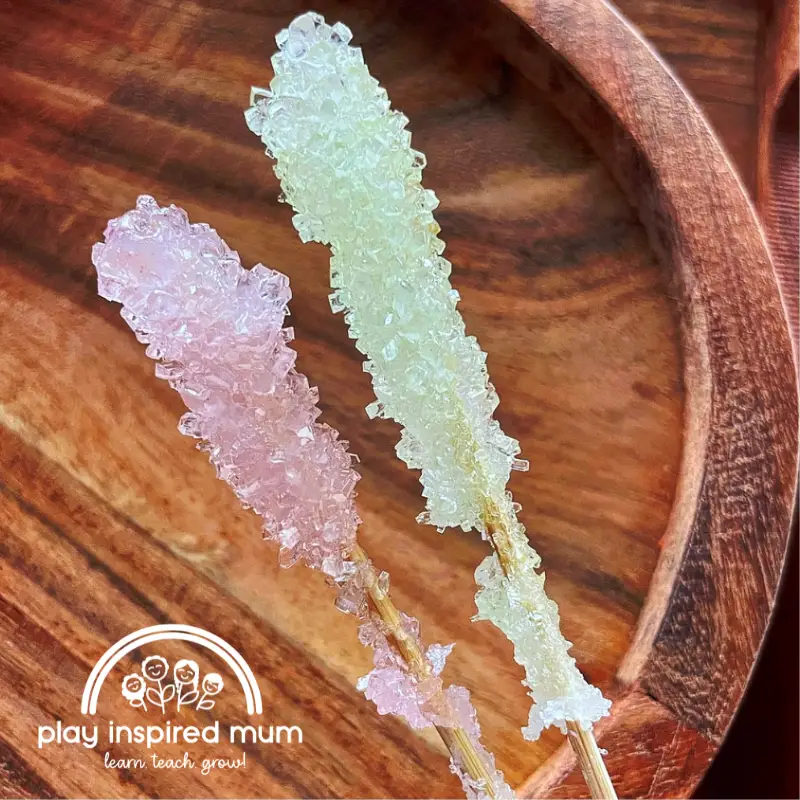
Now, it is time to wait. The sugar crystals will form over the next 5-10 days depending on weather conditions.
We covered ours with a small plastic bag to stop dust from settling in our edible science experiment.
Once satisfied with the crystal growth, remove from the jar and allow the crystals to dry. A layer of crystal may have formed across the top of the surface. Simply give it a tap with a spoon to release your crystal.
Time for you to enjoy!
How do I make sugar crystals fast?
Using a particle growth method instead of nucleation fast tracks the crystal growing process.
Particle growth involves increasing the size of an existing crystal. In this experiments case, that is the ‘sugar seed’ encasing either the string or skewer.
The crystals will form faster on the crystal seed in cooler conditions.
How to store homemade rock candy crystals
Store homemade rock candy crystals in plastic bags, wax paper or parchment paper. Rock candy sugar crystals will keep best for a few days when stored in airtight containers.
More fun with science